
|
 |
 |
 320x240  640x480 640x480 |
 320x240  640x480 640x480 |
 320x240  640x480 640x480 |
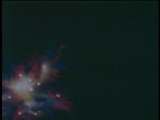
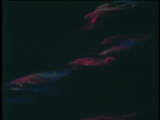
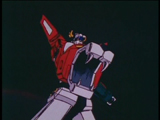
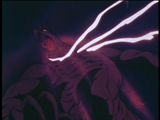
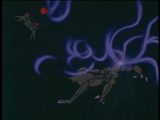
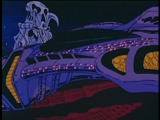
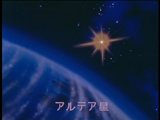
| Episode 1 of GoLion starts off with a panning shot of space (Figures 1-3), with what appears to be a star streaking through space at the end of the shot. |
 320x240  640x480 640x480 |
 320x240  640x480 640x480 |
 320x240  640x480 640x480 |
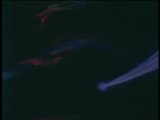
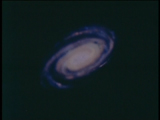
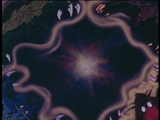
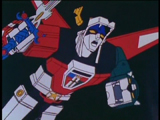
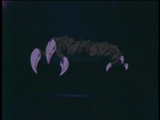
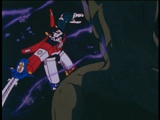
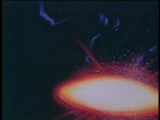
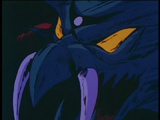
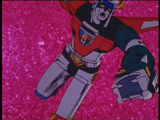
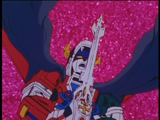
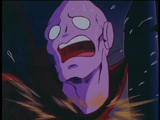
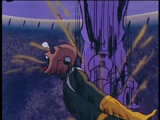
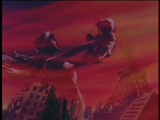
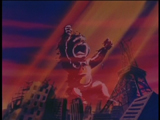
| A cross-fade transition from the end of the opening shot shows another area of space with an eerie quietness (Figure 4). The camera then pans leftwards and into view comes what looks like a galaxy configuration (Figure 5). After several Beastmen fly in to take on GoLion, we see the mighty robot positioning himself and roaring, ready to do battle with the beasts (Figure 6). |
 320x240  640x480 640x480 |
 320x240  640x480 640x480 |
 320x240  640x480 640x480 |
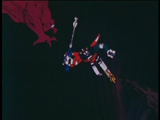
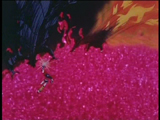
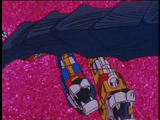
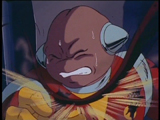
| After GoLion forms his sword, we see a group of Beastmen huddled together (Figure 7), ready to take on GoLion. The mighy robot then flies in to fight the beasts (Figure 8). As GoLion flies in, two Beastmen fly in to attack him (Figure 9). |
 320x240  640x480 640x480 |
 320x240  640x480 640x480 |
 320x240  640x480 640x480 |
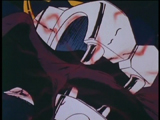
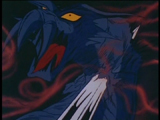
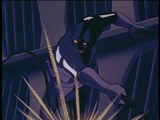
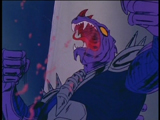
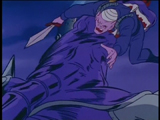
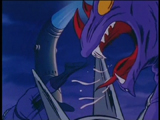
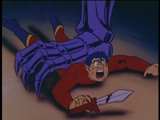
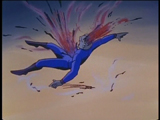
| GoLion bites one of the in-coming Beastmen (Figure 10). After releasing his grip on the Beastman, GoLion finishes him off by slashing him across the chest, which sends the creature falling backwards, blood flowing from his mortal wound (Figure 11). Another Beastman then starts flying in to take on GoLion (Figure 12). |
 320x240  640x480 640x480 |
 320x240  640x480 640x480 |
 320x240  640x480 640x480 |
| GoLion's hand then appears in the shot, holding his sword up in readiness (Figure 13). When the Beastman makes a sudden lunge at GoLion, GoLion retaliates by slicing his head off (Figure 14). The beheaded Beastman falls backwards, his severed head flying down into view (Figure 15). |
 320x240  640x480 640x480 |
 320x240  640x480 640x480 |
 320x240  640x480 640x480 |
| The body of the beheaded Beastman then explodes (Figure 16). Another Beastman then flies in to take on GoLion (Figure 17). He and another Beastman fly down towards GoLion (Figure 18). |
 320x240  640x480 640x480 |
 320x240  640x480 640x480 |
 320x240  640x480 640x480 |
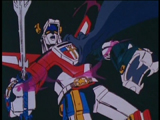
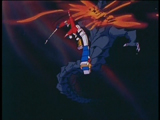
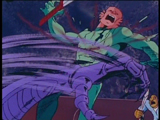
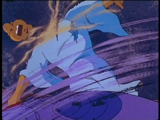
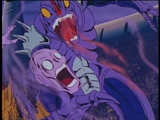
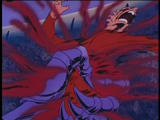
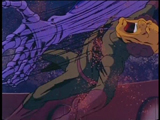
| GoLion appears to be in position to take on the in-coming Beastmen (Figure 19), but ends up on the receiving end of a tail strike by one of the monsters (Figure 20). After recovering from the blow and staving off a flame attack from one of the monsters, GoLion furiously swings his sword about in attack, managing to slash to death one of the Beastmen (Figure 21). |
 320x240  640x480 640x480 |
 320x240  640x480 640x480 |
 320x240  640x480 640x480 |
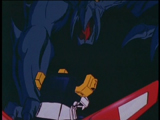
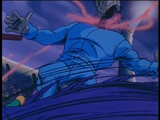
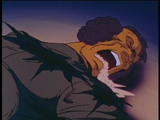
| GoLion is then suddenly grabbed on his shoulder and chest by the other Beastman (Figure 22) and forced around (Figure 23). As he is being held by the monster, GoLion struggles to strike the Beastman (Figure 24). |
 320x240  640x480 640x480 |
 320x240  640x480 640x480 |
| GoLion manages to stab the Beastman through the neck (Figure 25) and then slices his head off his body (Figure 26), killing the monster. |
 |
 320x240  640x480 640x480 |
 320x240  640x480 640x480 |
 320x240  640x480 640x480 |
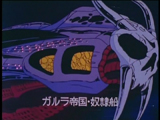
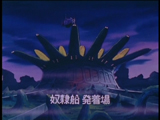
| The next scene of Episode 1 in GoLion introduces the Galra (Doom) slave ship that is carrying a group of alien captives. The panning shot of the ship (Figures 27 & 28) was not cut from Voltron but was cropped to eliminate the on-screen Japanese text. Inside the ship, several captives are on the receiving end of violent whippings (Figure 29, and Figures 30 & 31 below). |
 320x240  640x480 640x480 |
 320x240  640x480 640x480 |
 320x240  640x480 640x480 |
| The whippings continue (Figures 30 & 31). The shot of the slave master cracking his whip (Figure 32) was not cut from Voltron but was cropped for some reason. |
 320x240  640x480 640x480 |
 320x240  640x480 640x480 |
| During a panning shot, another slave is seen being whipped as other captives look on in horror (Figures 33 & 34). |
 |
 320x240  640x480 640x480 |
 320x240  640x480 640x480 |
 320x240  640x480 640x480 |
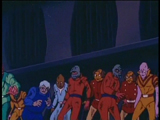
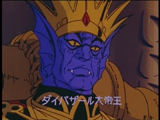
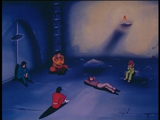
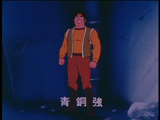
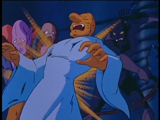
| In the introduction of Galra (Doom) sequence, a round of character introductions are made. The first shot of Emperor Daibarzaal (Zarkon) as he sits on his throne (Figure 35) was not cut from Voltron but was cropped to eliminate the on-screen Japanese text. The establishing shot of the Galra (Doom) docking bay (Figure 36) wasn't cut from Voltron either but was cropped to eliminate the on-screen Japanese text. The establishing shot of the youths in the slave dungeon (Figure 37) wasn't cut from Voltron either but was cropped in the original broadcast airings, VHS releases and the Australian DVD. The shot is not cropped on the Media Blasters Voltron DVD. |
 320x240  640x480 640x480 |
 320x240  640x480 640x480 |
 320x240  640x480 640x480 |
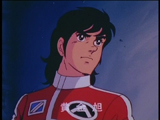
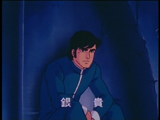
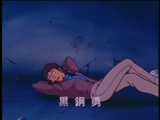
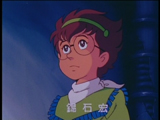
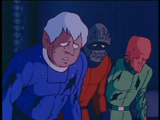
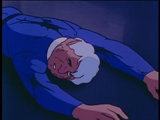
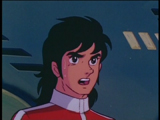
| The shot of Kogane (Keith) speaking (Figure 38) was not cut from Voltron but was cropped to eliminate the on-screen Japanese text. The shot of Shirogane (Sven) sitting and listening (Figure 39) was not cut from Voltron either but was cropped to eliminate the on-screen Japanese text. The shot of Kurogane (Lance) lying on the ground (Figure 40) was not cut from Voltron but was cropped to eliminate the on-screen Japanese text. |
 320x240  640x480 640x480 |
 320x240  640x480 640x480 |
| The shot of Seidou (Hunk) standing up and venting his frustrations (Figure 41) was not cut from Voltron but was cropped to eliminate the on-screen Japanese text. The shot of Chibi (Pidge) speaking (Figure 42) wasn't cut from Voltron either but was cropped to eliminate the on-screen Japanese text. |
 |
 320x240  640x480 640x480 |
 320x240  640x480 640x480 |
 320x240  640x480 640x480 |
| As the captives from the Galra (Doom) ship are being rounded up, one of them struggles to stay on his feet (Figure 43) but is too weary and falls to the ground (Figure 44). He is then kicked in the face by a Galra (Doom) soldier (Figure 45). |
 320x240  640x480 640x480 |
 320x240  640x480 640x480 |
 320x240  640x480 640x480 |
| The force of the kick sends the captive falling backwards on to the floor (Figure 46). Another captive then falls on top of him (Figure 47). After barking orders at the captives, Zadak (Yurak) throws his sword at one of them, piercing his chest and killing him (Figure 48). |
 320x240  640x480 640x480 |
 320x240  640x480 640x480 |
| Two other slaves are then whipped by whipmasters (Figures 49 & 50) in order to keep the captives moving. |
 |
 320x240  640x480 640x480 |
 320x240  640x480 640x480 |
 320x240  640x480 640x480 |
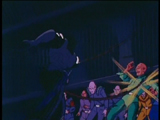
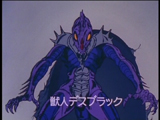
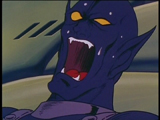
| The shot of the unleashed Beastman standing in place and then roaring (Figures 50 & 51) was not cut from Voltron but was cropped to eliminate the on-screen Japanese text. After closing in on fearful captives, the Beastman picks up one of them in his mouth, holds him up (Figure 53) ... |
 320x240  640x480 640x480 |
 320x240  640x480 640x480 |
 320x240  640x480 640x480 |
| ... and then throws him aside (Figure 54). After several captives attempt to kill the Beastman with their weapons, the monstrous creature retaliates. He slashes one captive across the chest (Figure 55) and slices through the neck of another, beheading him (Figure 56). |
 320x240  640x480 640x480 |
 320x240  640x480 640x480 |
 320x240  640x480 640x480 |
| The Beastman then stomps to death another captive (Figure 57) and proceeds to behead two more captives by slicing through their necks (Figures 58 & 59). |
 320x240  640x480 640x480 |
 320x240  640x480 640x480 |
 320x240  640x480 640x480 |
| The Beastman squeezes another captive to death, causing a great deal of blood to splurt out everywhere (Figure 60). The Beastman then punches another captive in the back, the force of the blow causing his eyeballs to pop out of their sockets (Figure 61). The Beastman then throws another captive to the ground, the violent impact causing blood to heavily splurt out from his stomach and head (Figure 62). |
 320x240  640x480 640x480 |
 320x240  640x480 640x480 |
 320x240  640x480 640x480 |
| The last standing captive is slashed across the chest by the Beastman (Figure 63) and hits the ground, dying almost instantly (Figure 64). Following the Beastman's victorious roar and the crowd's cheering, one of the mortally wounded captives shakes his hand in agony (Figure 65), uttering a last and painful curse at Daibarzaal before dying. |
 320x240  640x480 640x480 |
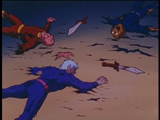
| As the scene comes to a close, the mutilated remains of several captives are shown (Figure 66). |
 320x240  640x480 640x480 |
 320x240  640x480 640x480 |
 320x240  640x480 640x480 |
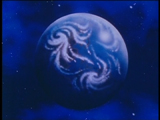
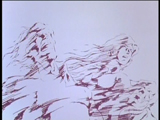
| After the arena massacre, Kogane (Keith) has a flashback of the nuclear war on Earth that left the planet dead. The two establishing shots of Earth (Figures 67 & 68) were not cut from Voltron but were cropped to eliminate the on-screen Japanese text. After the first wave of nuclear missiles hit, several people are vapourised by the blast (Figure 69). |
 320x240  640x480 640x480 |
 320x240  640x480 640x480 |
 320x240  640x480 640x480 |
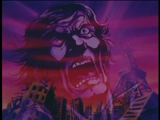
| After the second wave of nuclear missiles hit, several people are shown suffering from the blasts in static shots (Figures 70-72). |
 320x240  640x480 640x480 |
| At the end of his flashback, Kogane (Keith) clenches his fists in anger at what happened on Earth (Figure 73). |
 |
 320x240  640x480 640x480 |
 320x240  640x480 640x480 |
 320x240  640x480 640x480 |
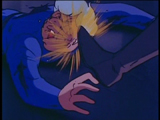
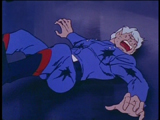
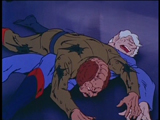
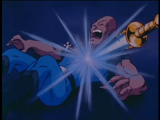
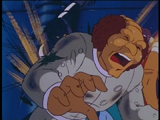
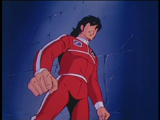
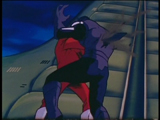
| As the youths attempt to hijack a ship to escape from Galra (Doom), they are interrupted by a group of soldiers who attack them in an attempt to stop them. Kogane (Keith) gets into a struggle with one of them and manages to use the soldier's sword against him by stabbing him through the chest, the sword protruding from his back (Figure 74). The soldier lets out a scream of pain (Figure 75) before the camera cuts to a shot of his back with the sword protruding from his fatal wound (Figure 76). |
 320x240  640x480 640x480 |
| After the fatally wounded soldier falls, the camera closes-up on Kogane's (Keith) face as he tells his friends to get a move on. |
 |
 320x240  640x480 640x480 |
 320x240  640x480 640x480 |
 320x240  640x480 640x480 |
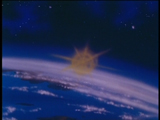
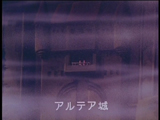
| The establishing shots of Altea (Arus) as the youths arrive on the planet (Figures 78 & 79) were not cut from Voltron but were cropped to eliminate the on-screen Japanese text. After entering Altea (Arus), the youths come across the a battered castle. A close-up shot of the castle shows two people standing on the balcony (Figure 80). |
 320x240  640x480 640x480 |
 320x240  640x480 640x480 |
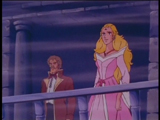
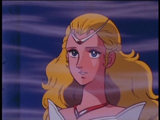
| Standing on the balcony are Gunshi (Coran) and Farla (Allura) (Figure 81). The camera then cuts to a close-up of Farla (Allura) as she apparently watches the ship (Figure 82). |
 |